Converting Adobe Illustrator to VideoScribe Whiteboard Animation Tutorial
One of the founders and content contributors for Prosperopedia, my buddy and business partner Ben Accinelli, happens to be an expert in photography, filming, and video editing.
I asked Ben to brain dump some of the stuff he knows about video editing. In particular, I wanted to know how he created the whiteboard graphics he made for a company we used to both work for called DemoChimp.
Ben made an instructive tutorial video to explain how to take an image and use an Adobe Illustrator to Videoscribe conversion technique to create a handy whiteboard animation of Nacho Libre. I’m going to walk you through a screen shot version of his instructions so that, if you’re so inclined, you can follow along and learn the technique. I’ll also embed Ben’s original video so that you can simply watch how he does it in case you’re that kind of learner.
Open Animation Image and Create Layers
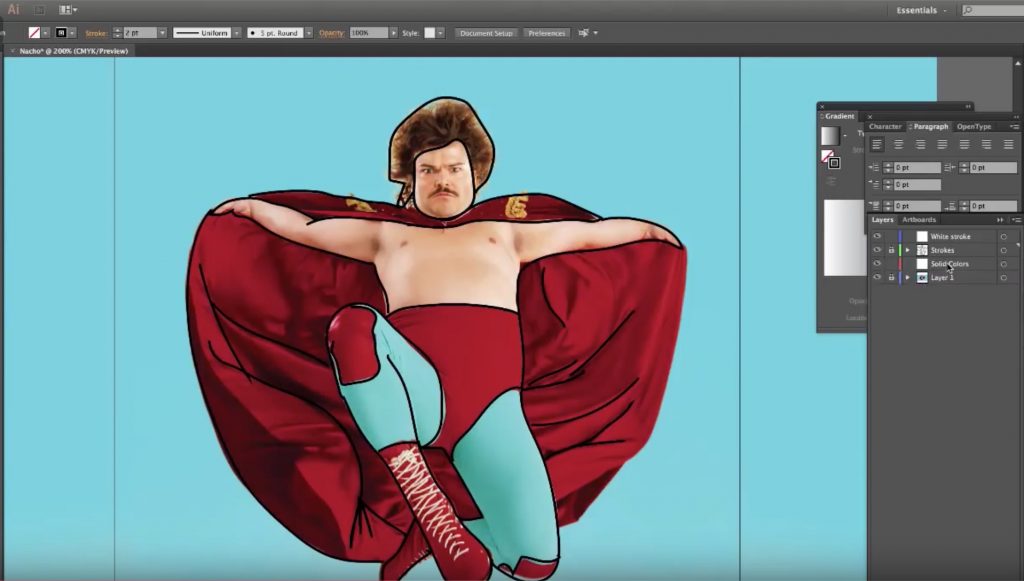
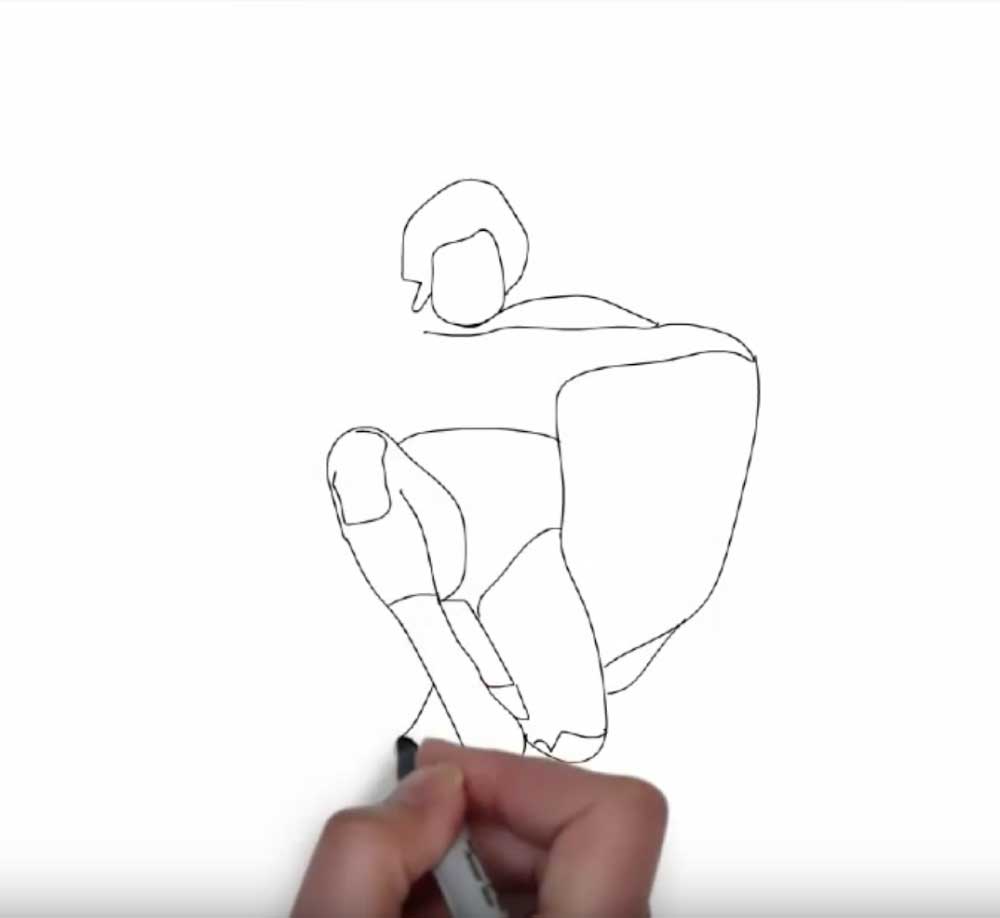
As mentioned, for Ben’s example, he uses an image of Nacho Libre.
First open the image on a 480px x 480px canvas, then create three new layers. Ben names his layers “White stroke”, “Strokes”, and “Solid Colors”. He then locks “Layer 1”, the original layer that contains the Nacho Libre image.
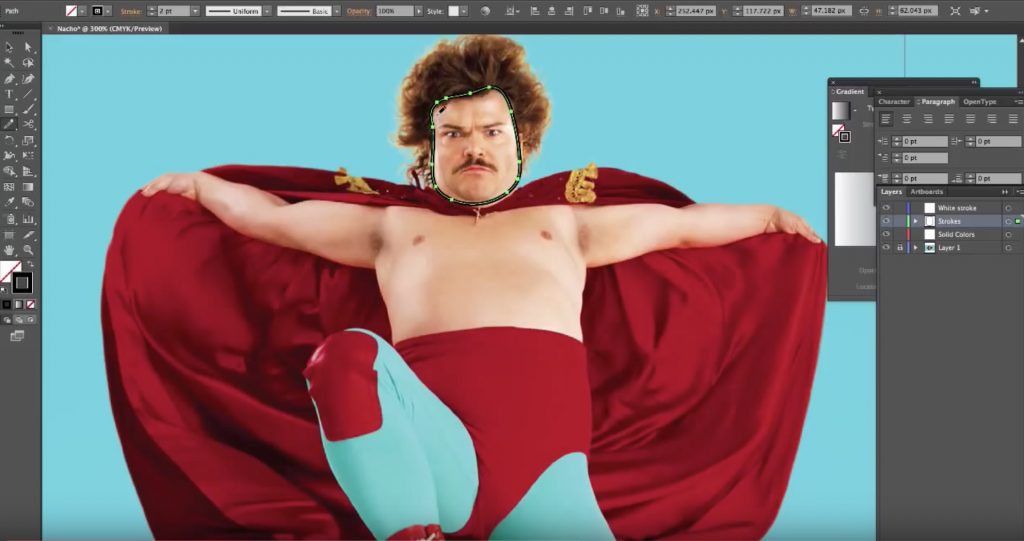
Creating Paths for Animation Sections Using the Pencil Tool and Stroke Paths
Using the pencil tool at a stroke setting of 2-points, and with the “Strokes” layer selected, you’ll outline the various sections of the image in the order you want them drawn on your final Videoscribe animation. In Ben’s case, he outlined the face, then the head, and worked his way around Nacho’s spread out cape, next to his arms, and finally finished at his knees and legs/feet.
The paths created by these outlines can be dragged up and down in relation to each other, which rearranges the order in which they will be drawn in the Videoscribe whiteboard animation. When Videoscribe draws these paths, it begins with the paths at the bottom of the order and moves sequentially up to the top.
Once you’ve completed drawing the stroke paths for the entire image, go ahead and lock the “Strokes” layer.

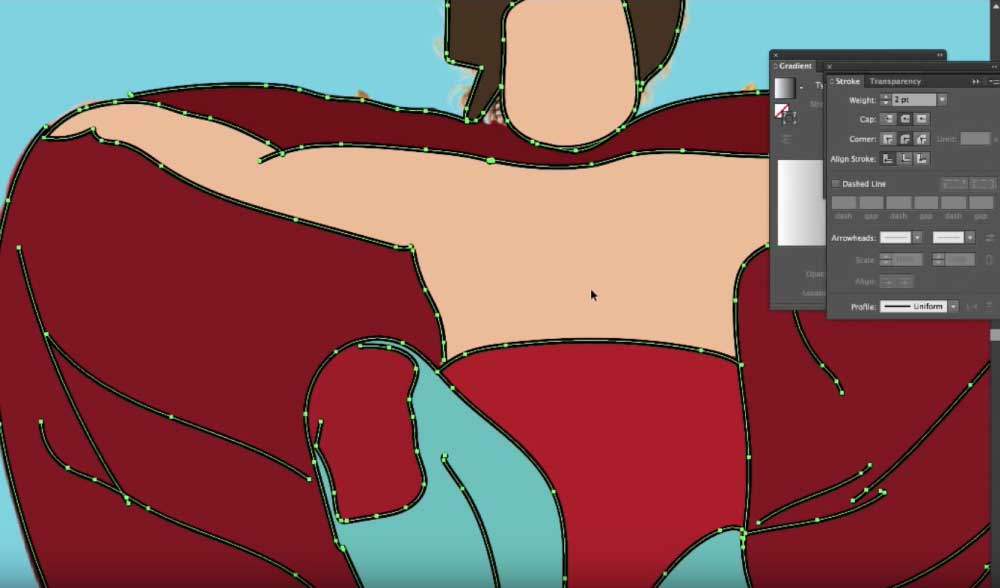
Filling Paths with Solid Colors Using the Eyedropper and Pen Tools
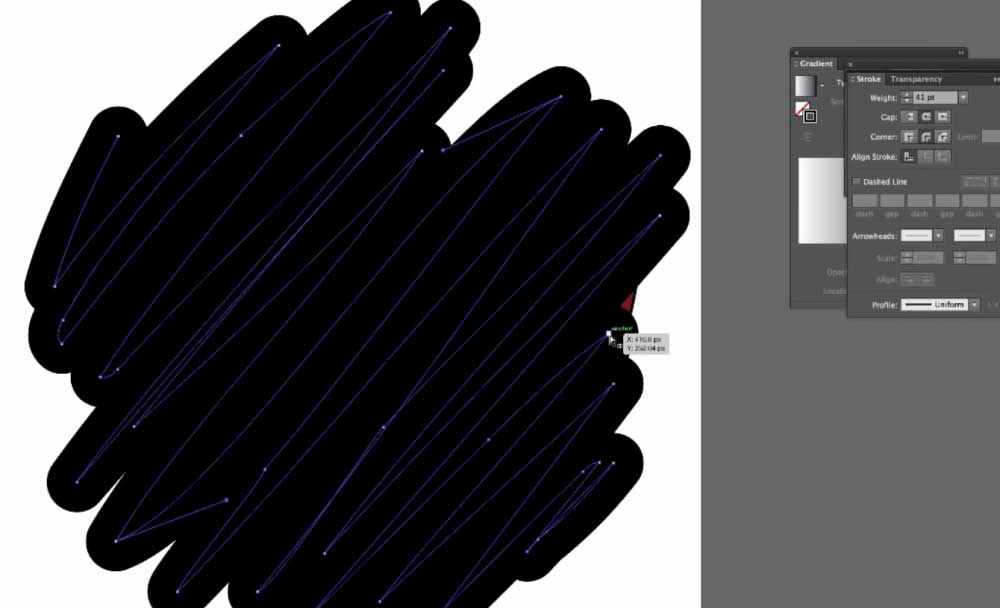
After you have creates paths for the various sections of the image you’re going to be turning into a whiteboard animation, the next step is to use the pen tool and the eyedropper tool to fill in each of the path sections you’ve created with solid fills.
You’ll select the “Solid Colors” layer, then select the eyedropper tool to choose a color from the path you’re going to fill. Once you’ve selected a color using the eyedropper tool, you’ll use the pen tool to fill that path with that color, making the interior of the path one solid color.
To hide the color overlap for each successive path you fill, you’ll get rid of overlapping sections by moving the overlapping section behind the others. On a Mac, you can use Command-Shift-[ to accomplish that.
Fill with solid colors each of the different paths you created in the previous step using the pencil tool.
Use Rounded Caps and Rounded Corners Tools to Make the Animation More Realistic
After you’ve used the eyedropper and pen tools to fill your stroke paths with solid colors, the next step is to make an adjustment that will make your animation more realistic.
To do this, go to back to your “Strokes” layer, select the layer, and change both the “Cap” and “Corner” settings to rounded. Making this adjustment will cause the animation to look more like it was hand drawn, closer to a realistic whiteboard look.
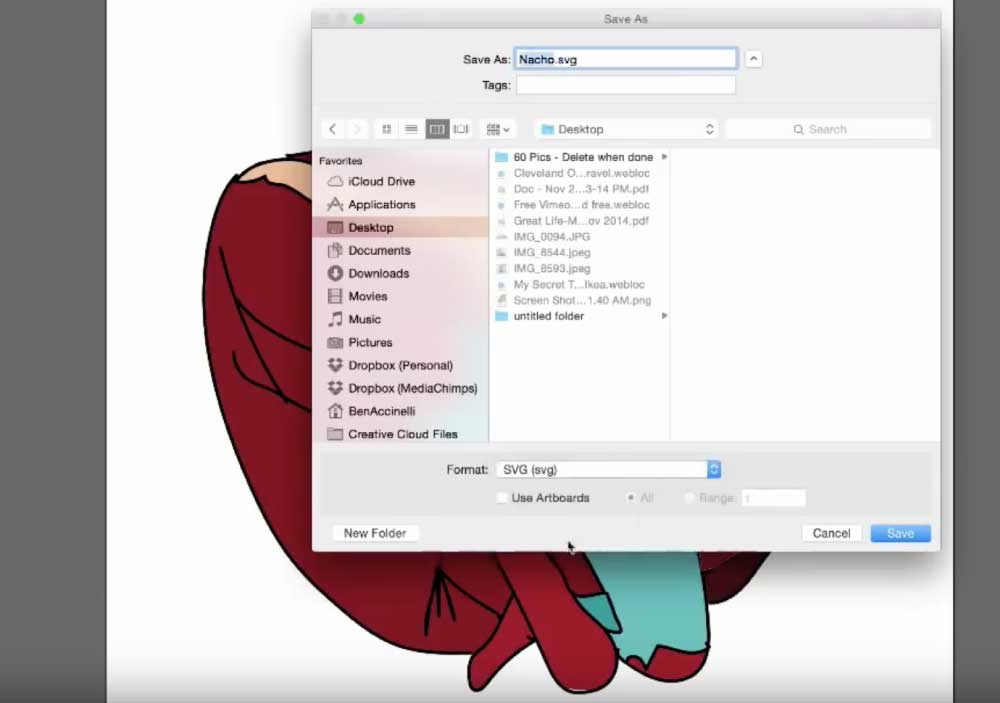
Save Your Illustrator Animation Graphic as an SVG File
Now you’re just about ready to save your animation graphic. To prepare to do so, turn off the layer that contains the initial Nacho Libre graphic so that all that remains visible is the animation part of the image.
Now select “Save As…” and choose the SVG (stroke vector graphic) format from the drop-down menu at the bottom of the “Save As…” tool. Make sure to use “Embed” as the image location.
Open and Play the Animation in Videoscribe
Now that you’ve finished and saved your animation in Illustrator, you can open it in Videoscribe and play the animation.
You will see the Videoscribe whiteboard hand draw the graphic following the path sequence you created in Illustrator.
Bonus: Add a Transparent Stroke for Realistic Color Fill Effect
If you’d like to add a more realistic fill effect (instead of the color fill occur instantaneously once the outlines are drawn) on your Videoscribe animation, you can edit the graphic in Illustrator and add a stroke to the “White stroke” layer. The stroke should be manipulated to cover the entire image.
The net effect of adding this last stroke is that the fill on the Videoscribe whiteboard animation will be done gradually instead of appearing immediately after the outline paths are drawn. This makes the whiteboard animation more realistic.